Learning how to take screenshot on Windows 11 is one of the most practical skills every PC user should master. Screenshots help you capture exactly what’s on your display—whether you’re saving an important document, sharing a conversation, or creating a tutorial. With the latest Windows 11 update, Microsoft has made it easier than ever to capture your screen using built-in tools and quick keyboard shortcuts.
Unlike older versions, Windows 11 gives users multiple ways to take screenshots. You can use the Print Screen (PrtScn) button, the Windows + Shift + S shortcut to open the Snipping Tool, or the Xbox Game Bar for in-game captures. Each option offers a unique way to capture your screen—from full-screen images to specific areas or windows. These flexible features make Windows 11 screenshot shortcuts ideal for both casual and professional users.
In this comprehensive guide, we’ll cover everything you need to know about how to take screenshots on Windows 11. You’ll learn how to use the new Snipping Tool, explore keyboard shortcuts for screenshots, and find out where your captured images are saved. We’ll also share tips on editing, saving, and organizing your screenshots efficiently.
Whether you’re a content creator, student, gamer, or office worker, this guide will help you capture and manage screenshots in Windows 11 like a pro. By the end, you’ll know every method to take, edit, and share screenshots—quickly and effectively—using the best tools built right into Windows 11.
Why Screenshot Skills Matter
Screenshots (screen captures) serve many purposes:
-
Documentation & Tutorials: If you are writing how-to guides, training materials, or help-desk content, screenshots allow you to show exactly what you mean.
-
Bug Reporting & Support: When an application misbehaves, capturing an image of the error message or the exact screen state helps developers support you faster.
-
Sharing Visuals: Whether you’re showing a chat, design layout, or a full-screen game moment, a screenshot is immediate and universal.
-
Record Keeping: Sometimes you need to store a quick “proof” of something on screen — a receipt, chat, settings page, etc.
-
Creative & Workflow Use: For content creators, educators, or professionals, being able to capture parts of your screen (windows, a browser tab, or a selected region) is highly time-saving.
Given that screenshotting is such a frequent need, mastering the built-in tools in Windows 11 is valuable.
Overview of Screenshot Methods in Windows 11
Here are the main methods you will learn about in detail:
- Pressing Windows + PrtScn to auto-save
-
Capturing a specific area via Windows + Shift + S (Snipping Tool overlay)
-
Using the Print Screen (PrtScn) key
-
Screenshotting a single window with Alt + PrtScn
-
Using the Xbox Game Bar for gaming or full-screen apps
-
Third-party screenshot tools for extra features
-
Troubleshooting common issues and settings you should check
-
Best practices for anonymising/annotating and sharing screenshots
Each method has its best-use scenario, and we’ll walk you through when and why to use each.
Method 1: Windows + PrtScn – Auto-Save Screenshot
If you want a quicker workflow: capture & save in one go.
What it does
Pressing Windows key (⊞Win) + PrtScn will:
-
Dim the screen for a moment (visual confirmation).
-
Automatically save the screenshot as a file in the Pictures → Screenshots folder.
-
Also, send it to your clipboard (so you can paste if you want).
How to use it – step by step

-
Display the screen you want captured.
-
Press ⊞ Win + PrtScn simultaneously.
-
The screen will briefly dim (indicating the screenshot was taken).
-
Open File Explorer → This PC → Pictures → Screenshots.

-
Find your screenshot named “Screenshot (1).png”, … etc.
-
Rename/move the file as needed.
When to use it
-
When you take screenshots frequently and want them saved without the paste step.
-
For full-screen captures, where manual saving is extra work.
-
Ideal for a workflow where you capture, then later browse your screenshot folder.
Limitations
-
Captures full screen only (not a selective region).
-
Fixed saving location (unless you change it manually via Settings).
-
It might capture unwanted items if you have multiple monitors.
Method 2: Windows + Shift + S – Selective Screenshot (Snipping Tool Overlay)
For more flexibility: capture a region, window, or full screen via built-in overlay.
What it does
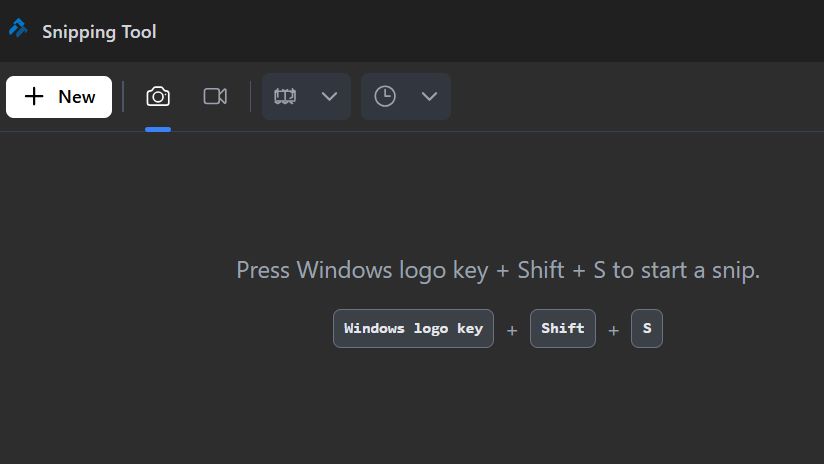
Pressing ⊞Win + Shift + S opens a lightweight overlay of the Snipping Tool with options: Rectangular Snip, Free-form Snip, Window Snip, Full-screen Snip. The selected area is copied to the clipboard, and a notification appears, which you can click to open the editor.
How to use it – step by step
-
Prepare your screen content.
-
Press ⊞Win + Shift + S.
-
At the top of the screen, a small toolbar appears with four icons (Rectangular, Free-form, Window, Full-screen).
-
Select the mode you want:
-
Rectangular: drag a rectangle around the area.
-
Free-form: draw any shape to capture.
-
Window: click a specific window to capture only that.
-
Fullscreen: capture the entire screen.
-
-
After selecting, the image is copied to the clipboard. A notification pops up (bottom-right).
-
Click the notification to open the Snipping Tool editor (optional).
-
In the editor, you can annotate (draw, highlight, crop) and then click Save (or press Ctrl + S) to save the file.
-
Alternatively, you can paste from the clipboard into another app (Ctrl + V) and save manually.
When to use it
-
When you don’t need the entire screen and only want a region or window.
-
When you annotate or crop the image.
-
When you prefer flexibility to choose an area before saving.
-
For tutorials, documentation, or focused captures.
Limitations
-
By default, the image goes to the clipboard; you still need to save manually (unless you use the editor).
-
Not as instantaneous as Win+PrtScn for full-screen captures.
-
If you miss the notification, it may get lost in the clipboard.
Method 3: Using the Print Screen (PrtScn) Key
The most classic and straightforward method.
What it does
Pressing the PrtScn (Print Screen) key captures your entire screen (all monitors if you have multiple) and copies the image to the Windows clipboard. From there, you can paste it into an image editor (e.g., Paint) or document (e.g., Word) and then save it manually.
How to use it – step by step
-
Display whatever you want on the screen (desktop, browser, app, etc.).
-
Press the PrtScn (sometimes labelled PrtSc, PrtScn, or Print Scr).
-
Open an application where you can paste an image — e.g., Paint: Start → Paint.
-
Press Ctrl + V to paste the screenshot.
-
If desired, crop or edit the image (via Paint or another editor).
-
Save the image: File → Save As → choose format (PNG, JPG) and folder.
When to use it
-
Quick capture of full screen when you don’t need automatic saving.
-
When you want to paste into a document immediately.
-
Multi-monitor setups are where you want everything at once.
Limitations
-
Does not automatically save to a file — you must paste and save manually.
-
Captures all monitors at once (which may not always be what you want).
-
No immediate editing tools built in.
Method 4: Alt + PrtScn – Screenshot Active Window Only
When you want to capture a specific window rather than the whole screen.
What it does
Pressing Alt + PrtScn will capture the currently active (frontmost) window and copy it to the clipboard. From there, you paste and save manually.
How to use it – step by step
-
Click or focus the window you want to screenshot (e.g., a browser, dialog box, or app).
-
Press Alt + PrtScn.
-
Open an editor (e.g., Paint) or document.
-
Paste with Ctrl + V.
-
Edit/crop if needed, then save the file via File → Save As.
When to use it
-
When you have multiple applications running and want only one window.
-
For cleaner screenshots, where you want to excludethe taskbar/desktop background.
-
For quick capture of dialog boxes, error windows, etc.
Limitations
-
The screenshot still goes to the clipboard — you must paste and save manually.
-
Doesn’t auto‐save to a file.
-
If you don’t focus on the correct window, you might capture something unintended.
Method 5: Using the Xbox Game Bar (for gaming or full-screen apps)
Ideal for gamers or apps that run full-screen (e.g., DirectX games) where conventional shortcuts may not work.
What it does
The built-in Xbox Game Bar in Windows 11 provides overlay controls for capturing screenshots and recording videos while gaming. You can press ⊞Win + G to open the Game Bar overlay, then click the camera icon or press ⊞Win + Alt + PrtScn to take a screenshot. The image is auto-saved in the Videos → Captures folder.
How to use it – step by step
-
Launch your game or full-screen app.
-
Press ⊞Win + G to open the Game Bar overlay.
-
In the “Capture” widget, click the camera icon (or press ⊞Win + Alt + PrtScn).
-
A notification appears: “Screenshot saved”.
-
Open File Explorer → This PC → Videos → Captures to find the image.
-
Rename or move as desired.
When to use it
-
While gaming, especially in full-screen games where standard shortcuts may be intercepted by the game.
-
For real-time screen capture during gameplay or live recording.
-
When you also might want video capture, you can switch to video after a screenshot.
Limitations
-
Slightly more overhead than simple keyboard combinations.
-
May require the Game Bar overlay to be enabled in Windows settings.
-
For simple desktop captures, it may be overkill.
Method 6: Third-Party Screenshot Tools
If the built-in Windows tools don’t give you enough flexibility (scrolling capture, custom upload, annotation suites), third-party tools may help.
Notable options
-
Greenshot: Free, open-source screenshot tool with capture modes, annotations, and export options.
-
PicPick: Screenshot + editor tool, supports full-page capture, annotation, and sharing.
Why you might use them
-
You need scrolling capture (e.g., capture entire webpage), which Windows tools don’t natively support.
-
You want advanced annotation, watermarking, upload/share features built in.
-
You want a custom hotkey, auto-upload to cloud, or batch processing.
-
You regularly create screenshot-heavy content (blogs, tutorials, training materials) and want a streamlined workflow.
Caveats
-
You must install and trust third-party software (check source, updates, privacy).
-
Might cost money (premium versions) or have a learning curve.
-
Built-in Windows methods are sufficient for many users, so an extra tool may be unnecessary.
Bonus: Delayed Screenshots, Menu Capture & More
Sometimes you need a screenshot of a menu, a tooltip, or something that appears only after a hover or click. Windows 11’s Snipping Tool supports a delay timer.
How to do it
-
Open Snipping Tool app (⊞Win + S → type Snipping Tool).
-
Click the Mode button or “New” and find the Delay option (e.g., 3-5 seconds).
-
Set the delay timer.
-
After you start the capture, open the menu or hover to display what you need.
-
The tool will capture after the delay, letting you capture dynamic elements.
Useful scenarios
-
Capturing right-click context menus.
-
Capturing hover tooltips.
-
Capturing dropdowns that disappear when you click elsewhere.
Where Are Screenshots Saved & How to Access Them
Default locations
-
For ⊞Win + PrtScn: File Explorer → This PC → Pictures → Screenshots.
-
For Game Bar captures: This PC → Videos → Captures.
-
For clipboard-only captures (PrtScn, Alt + PrtScn, ⊞Win + Shift + S): you’ll need to paste into an editor like Paint and save manually.
How to change the screenshot folder
Windows doesn’t provide a direct UI to change the default screenshot folder for built-in methods, but you can move the Pictures→Screenshots folder via right-click → Properties → Location tab to redirect it to a different place.
You can also utilise third-party tools for custom folders and naming schemes.
Tips for effective screenshot management
-
Use descriptive filenames (e.g.,
Invoice_Jan2025.pnginstead ofScreenshot (3).png). -
Create sub-folders by project, date, or type (Tutorials, Bugs, Personal).
-
Use cloud backup (OneDrive, Google Drive) to avoid losing screenshots if your PC fails.
-
Clean up periodically — delete older captures you don’t need to avoid clutter.
Annotating, Editing & Sharing Screenshots
Capturing is only half the job — you often need to annotate, highlight, or share your screenshots.
In Snipping Tool
-
After capture, click the thumbnail/notification to open the editor.
-
Use a Pen, a Highlighter, and a Ruler/Protractor (touch devices) to mark up.
-
Crop away unnecessary parts.
-
Save as PNG/JPG, or use the Share icon to send via email, OneDrive, etc.
In Paint (for clipboard captures)
-
Paste screenshot (Ctrl + V).
-
Use the Select tool to crop; the Brush/Shapes tool to annotate, Text tool to add notes.
-
Save or export.
Best practices for sharing
-
Blur or block out sensitive info (personal data, emails, addresses) before sharing widely.
-
Choose image format: PNG for high-quality and transparent backgrounds; JPG for smaller file size when quality isn’t critical.
-
Resize for web: large full-HD screenshots may be slow to load; consider compressing or scaling.
-
Rename the file meaningfully (keywords help SEO if you publish later).
-
Use ALT-text & descriptive captions if you post screenshots on a blog (improves accessibility and SEO).
Troubleshooting: When Screenshots Don’t Work
Even with all tools in place, you may run into issues. Here are common problems and fixes.
Problem: PrtScn or Win+PrtScn doesn’t capture
-
Check if the Print Screen key is disabled or remapped in Settings → Accessibility → Keyboard.
-
Some laptops require pressing Fn + PrtScn instead of just PrtScn.
-
If using multiple monitors, the screenshot may be saved, but you’re looking in the wrong monitor or folder.
Problem: ⊞ Win + Shift + S overlay doesn’t appear
-
Ensure Snipping Tool is enabled in Settings → System → Clipboard → Clipboard history (toggle on).
-
Try restarting Windows Explorer or the computer.
-
Some corporate or managed PCs may restrict screenshot tools via policy.
Problem: Screenshots look weird/blank
-
If you see a black screen instead of a screenshot of a protected window/app, that app may be using DRM or screen protection (e.g., secure banking apps).
-
If using multiple virtual desktops or remote sessions, the screenshot may capture only one desktop.
Problem: Screenshot folder location missing
-
For saved screenshots (Pictures → Screenshots), right-click the folder → Properties → Location tab to ensure it’s valid.
-
Check if the folder got moved/deleted; you can restore the default via “Restore Default” in the Location tab.
Privacy concerns
-
Be aware that screenshots may capture sensitive personal or work information.
-
Check for features like Windows Recall (in certain Copilot-enabled PCs) that automatically capture screenshots in the background — users have raised privacy concerns.
-
Always review what you’re capturing and subsequently sharing.
Advanced Tips & Hidden Features
Here are some advanced strategies and lesser-known features that help you get more from screenshotting in Windows 11.
Set Print Screen to open Snipping Tool
In Windows 11, you can set the Print Screen key to open the Snipping Tool instead of just copying to the clipboard. Go to Settings → Accessibility → Keyboard and toggle Use the Print screen button to open screen snipping.
This allows you to press PrtScn and immediately select a region, etc.
Use a delay timer for tricky captures
As noted above, use the Snipping Tool delay feature when you have menus or pop-ups that disappear when you click elsewhere.
Capture scrolling windows (via third-party)
Windows’ built-in tools don’t natively capture full-length webpages or scrollable areas. Use tools like Greenshot or PicPick for full-page capture.
Use OneDrive or the cloud to auto-save screenshots
If you use OneDrive, enable auto-save for screenshots in OneDrive settings (Picture library) so that screenshots are backed up and accessible on other devices.
Keyboard shortcut customisation
Combine screenshot shortcuts with your workflow tools (e.g., use AutoHotkey to remap keys, or integrate with screenshot/upload scripts) for power users.
Naming conventions & SEO for blogging
If you’re capturing images for blog posts: name your files with descriptive keywords (e.g., windows11-screenshot-win-shift-s.png), use ALT-text (for accessibility and SEO), and place images near related content for better indexing.
Summary & Final Thoughts
Taking a Screenshot on Windows 11 isn’t complicated — but knowing which method to use when really helps. Here’s a recap:
-
For full screen and auto-save: ⊞Win + PrtScn
-
For quick full screen to clipboard: PrtScn
-
For active window only: Alt + PrtScn
-
For region or window selection: ⊞Win + Shift + S (Snipping Tool overlay)
-
For advanced capture/annotation/delay: Use the Snipping Tool app
-
For gaming or full-screen apps: Use Xbox Game Bar
-
For extra features: Consider third-party tools (Greenshot, PicPick)
And always remember: save your screenshot files smartly, annotate before sharing, respect privacy, and leverage the workflow that fits your use case.
If you follow this guide and practice, you’ll have screenshotting in Windows 11 down to a science — whether you’re capturing a quick error message, crafting a tutorial, or archiving your screen regularly.
❓ Frequently Asked Questions (FAQs)
1. How do I take a screenshot on Windows 11 using the keyboard?
You can press PrtScn to copy the entire screen to the clipboard, or Windows + PrtScn to automatically save it in your Pictures → Screenshots folder.
For capturing a specific area, press Windows + Shift + S and select your desired region using the Snipping Tool overlay.
2. Where are my screenshots saved in Windows 11?
Screenshots taken with Windows + PrtScn are saved in
📁 C:\Users[YourName]\Pictures\Screenshots.
If you use Xbox Game Bar, they’re stored in
📁 C:\Users[YourName]\Videos\Captures.
Screens captured via PrtScn or Alt + PrtScn are copied to your clipboard — paste them into Paint or another app to save manually.
3. Can I take a screenshot of just one window in Windows 11?
Yes! Simply click the window you want to capture to make it active, then press Alt + PrtScn.
This will copy only that window to your clipboard — open Paint (or Word) and press Ctrl + V to paste and save it.
4. Does Windows 11 have a Snipping Tool?
Absolutely. Windows 11’s Snipping Tool is more powerful than ever — it combines features from the old Snipping Tool and Snip & Sketch.
You can open it by pressing Windows + Shift + S or searching “Snipping Tool” in the Start menu.
It allows you to capture regions, windows, or full screens, plus edit, annotate, and save screenshots easily.
5. What’s the best way to take a scrolling screenshot in Windows 11?
Windows 11 doesn’t have a built-in scrolling screenshot option.
To capture an entire webpage or long document, you can use third-party apps such as PicPick, ShareX, or Snagit — they support scrolling captures for browsers, PDFs, and apps.