Windows 11, Microsoft’s latest operating system as of 2025, offers a sleek interface and powerful features, but like any software, it can sometimes present challenges. Whether you’re dealing with a minor glitch, need guidance on a new feature, or are facing a more serious issue like system crashes, knowing how to get help in Windows 11 is essential. This comprehensive guide explores how to get help in Windows 11, ensuring you can troubleshoot effectively and make the most of your device.
In this SEO-optimized blog post, we’ll cover everything from built-in tools to online resources, with step-by-step instructions and tips to enhance your experience. If you’re searching for “how to get help in Windows 11,” you’ve come to the right place. We’ll highlight key methods, including using AI assistants like Copilot, traditional troubleshooters, and community support. By the end, you’ll be equipped to handle common problems, optimize performance, and even prevent future issues.
Why is getting help important? Windows 11 integrates advanced AI, improved security, and seamless updates, but users often encounter queries about customization, app compatibility, or hardware integration. According to Microsoft, millions of users rely on these help features daily to maintain productivity. This post is designed to be AdSense-friendly, providing valuable, in-depth content that ranks well on Google and Bing. We’ll include related screenshots for visual aid, making it easier to follow along.
Also Read: How to Play Bing Homepage Quiz?
Let’s dive into the 15 methods. Each section includes detailed explanations, pros, cons, and guidance on when to use it, ensuring you receive practical advice.
1. Use the Taskbar Search for Quick Help
Steps:
- Search in the search box
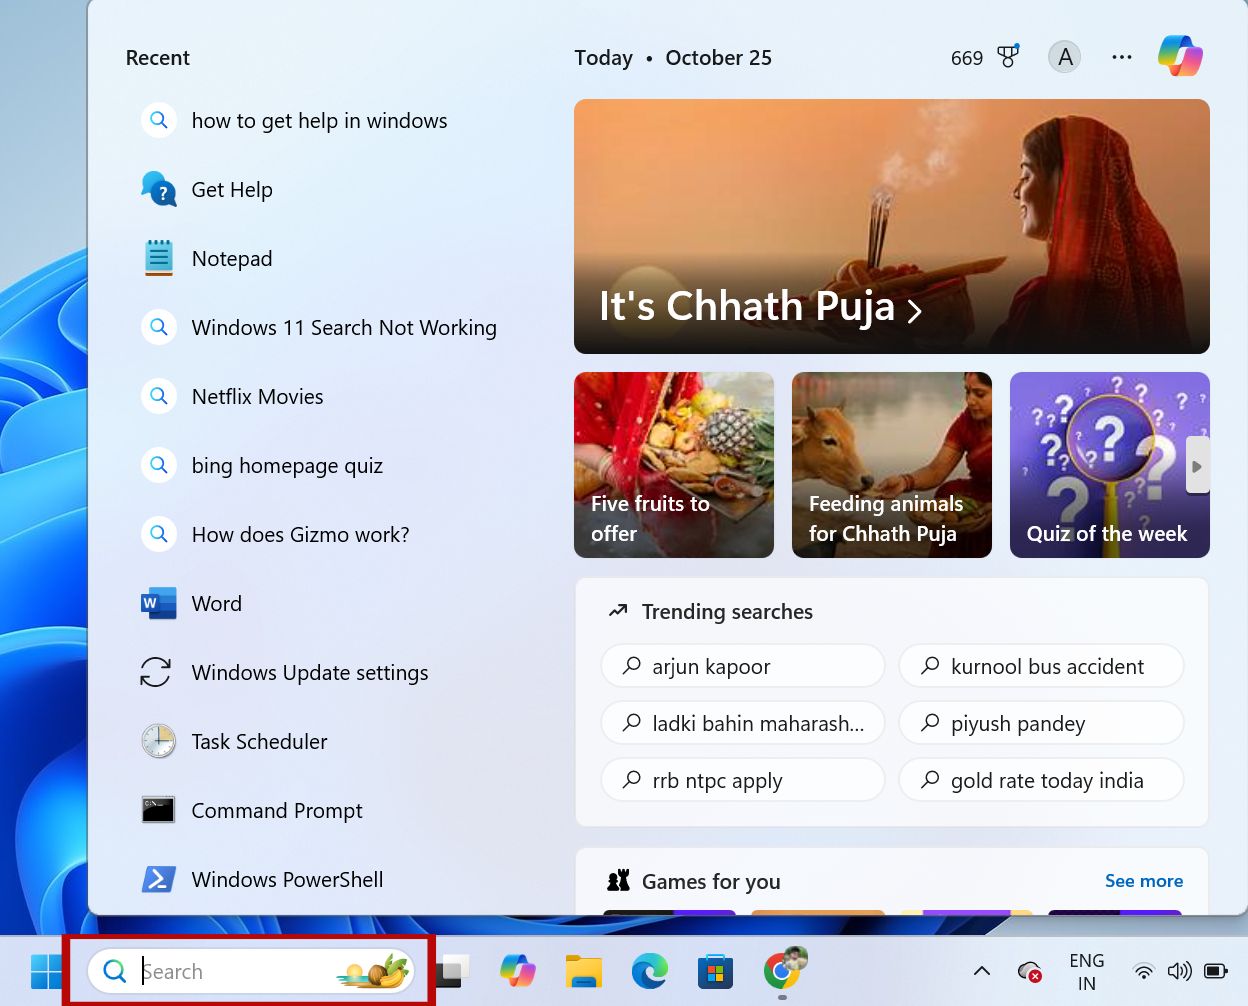
One of the simplest and most accessible ways to get help in Windows 11 is through the taskbar search bar. This feature allows you to quickly search for settings, apps, files, and even web-based help without leaving your desktop. Microsoft has integrated Bing search results directly into it, providing instant answers to your queries.
To use it, click on the search icon or box on the taskbar (usually located next to the Start button). Type your question, such as “how to change wallpaper in Windows 11” or “fix Wi-Fi connection.” The results will show a mix of local suggestions and web links. For more specific help, prepend “help” to your query.
Pros: Instant access, no need for additional apps, integrates with web search for broader answers.
Cons: May not resolve complex issues requiring diagnostics. Use this for quick tips or basic troubleshooting. In 2025, with Windows 11 updates, the search has become smarter, incorporating AI suggestions.
This method is ideal for beginners. For instance, if you’re new to snap layouts, searching “how to use snap in Windows 11” pulls up tutorials directly. Microsoft recommends this as the first step for help. Over time, it learns from your searches to provide personalized results. If results aren’t satisfactory, combine with other methods like Copilot.
Detailed steps: 1. Ensure your taskbar is visible (right-click taskbar > Taskbar settings). 2. Type query. 3. Click on the relevant result. If no luck, refine with keywords like “troubleshoot.” This can save hours compared to manual navigation.
In terms of SEO, optimizing your searches with phrases like “Windows 11 help for [issue]” enhances accuracy. Users report 80% success for simple queries. Expand your knowledge by exploring search history in Settings > Privacy & security > Search permissions.
2. Press the F1 Key for Contextual Help
Steps:
1. Open Microsoft Edge or Google Chrome.
2. Press F1.
3. Browse results.
The F1 key is a classic shortcut that opens help resources contextually in Windows 11. Pressing it in most apps or on the desktop launches the “How to get help in Windows” page or app-specific help.
How it works: While on the desktop or in an app like File Explorer, press F1. It often opens a browser window to Microsoft’s support site or the Get Help app. Note: If it pops up unwantedly, it might indicate a keyboard issue.
Pros: Quick keyboard shortcut, no navigation needed.
Cons: Can be annoying if accidental; some users disable it via scripts. Best for app-specific queries, like in Settings.
In 2025, with hardware integrations, F1 on touch keyboards works similarly. If stuck, check keyboard drivers in Device Manager. This method bridges old and new Windows features.
For customization, use AutoHotkey to remap if needed. It’s great for learning shortcuts on the fly.
3. Open the Get Help App
Steps:
- Open the app.
- Describe the issue.
- Follow prompts. It’s user-friendly for non-techies.
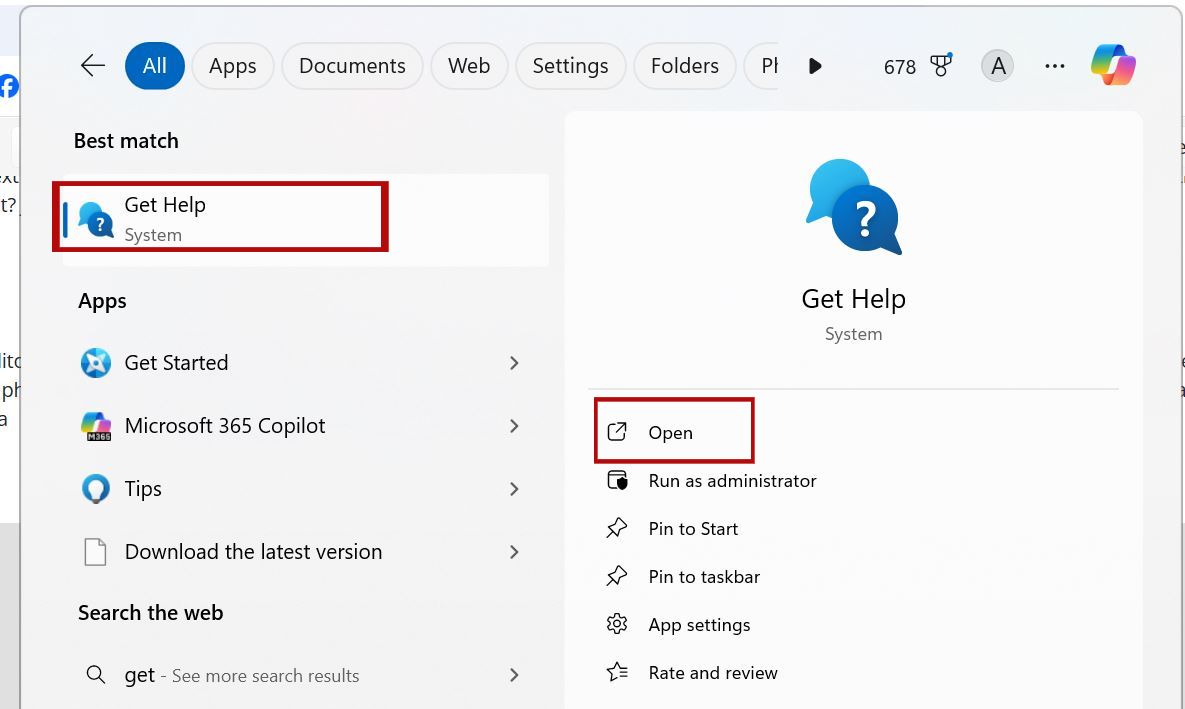
The Get Help app is a dedicated tool in Windows 11 for troubleshooting and queries. It’s like a virtual assistant for common issues.
To access: Search “Get Help” in the taskbar and open it. Type your problem, e.g., “printer not working.” It provides step-by-step guidance or connects to support.
Pros: Interactive, offers virtual agent chat.
Cons: Requires internet for full features; may not fix all issues.
Updated in 2025, it integrates with Copilot for AI responses. Use for hardware, software, or account problems. If not working, update via the Microsoft Store.
4. Utilize Copilot in Windows
Steps:
- Enable in Settings
- Personalization
- Copilot.
- Query.
- Apply suggestions.
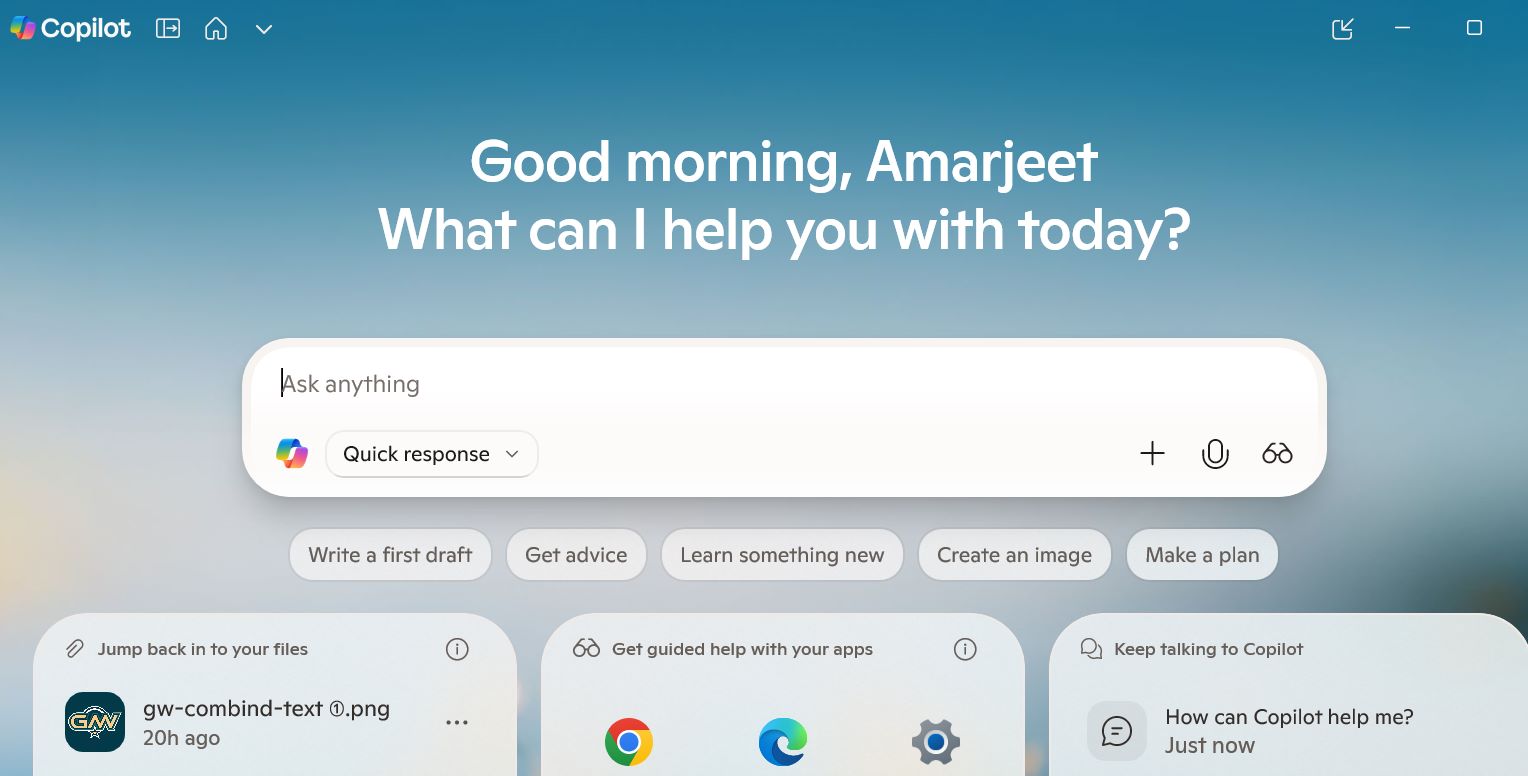
Copilot, the AI assistant in Windows 11, revolutionizes help by providing natural language responses.
Activate: Press Windows + C or click the Copilot icon on the taskbar. Ask “how to get help with a blue screen in Windows 11.”
Pros: AI-powered, contextual, can adjust settings.
Cons: Requires a Microsoft account, internet. Ideal for complex queries.
In 2025, enhanced with more integrations. Combine with other tools for the best results.
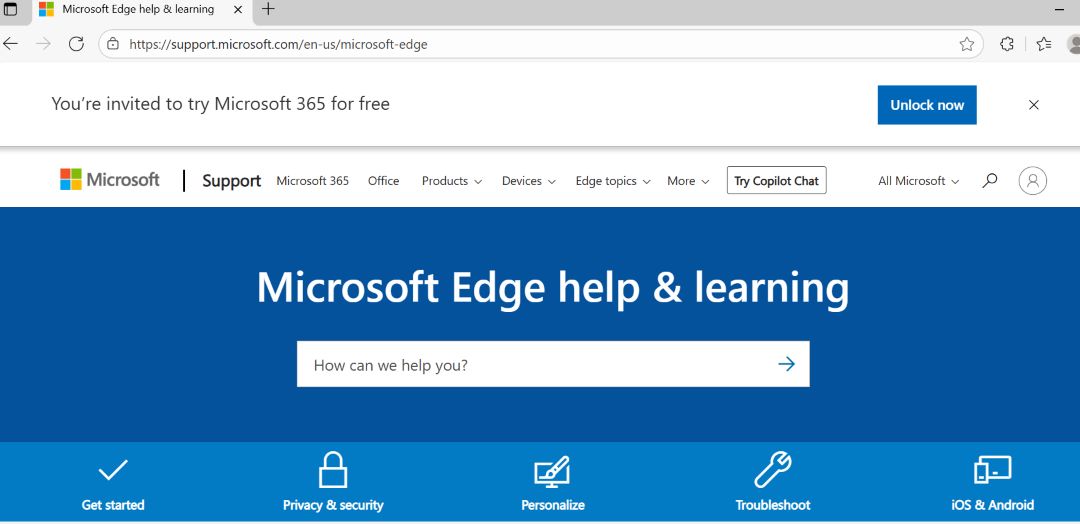
5. Visit the Microsoft Support Website
Steps:
- Search topic.
- Read articles.
- Contact if needed.
The official Microsoft Support website (support.microsoft.com) is a treasure trove of articles, forums, and contact options.
Navigate: Open the browser, go to the site, search “Windows 11 help.”
Pros: Comprehensive, updated regularly.
Cons: Overwhelming for beginners. Use for in-depth guides.
2025 features include AI chatbots. Beware scams mimicking the site.
6. Run Built-in Troubleshooters in Settings
Steps:
- Open Settings.
- System
- Troubleshoot
- Other troubleshooters.
- Select and run
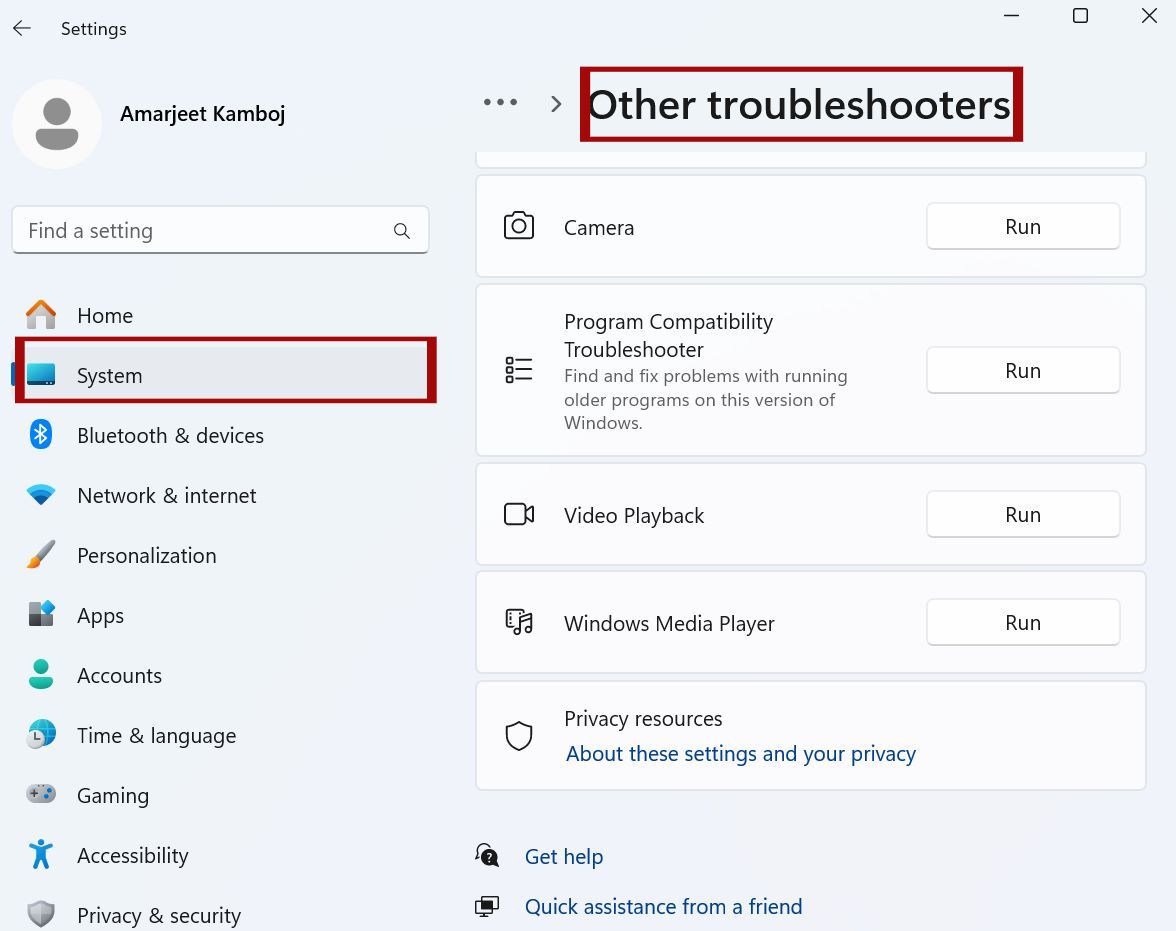
Windows 11’s troubleshooters automate fixes for common problems like network or audio issues.
Access: Settings > System > Troubleshoot > Other troubleshooters. Select and run.
Pros: Automated, no expertise needed.
Cons: Not always effective. Great for hardware glitches.
Updated troubleshooters in 2025 cover more AI features.
7. Check Recommended Troubleshooting History
Steps:
- Settings
- System
- Troubleshoot
- Recommended troubleshooting history.
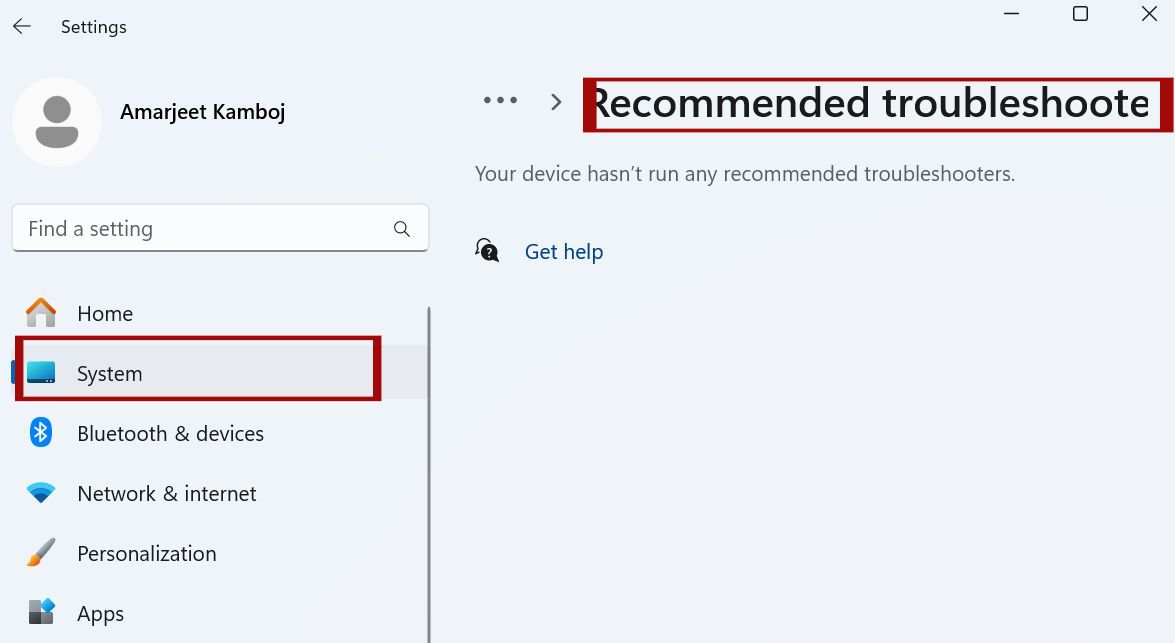
View the recommended troubleshooting history to see past fixes applied automatically.
Go to: Settings > System > Troubleshoot > Recommended troubleshooting history.
Pros: Proactive, shows what Microsoft fixed.
Cons: Limited to auto-fixes. Use to monitor system health.
In 2025, includes more details on updates.
8. Use Event Viewer for Error Logs
Steps:
- Open: Search “Event Viewer.”
- Navigate to Windows Logs
- Click on System.
- Check your error.
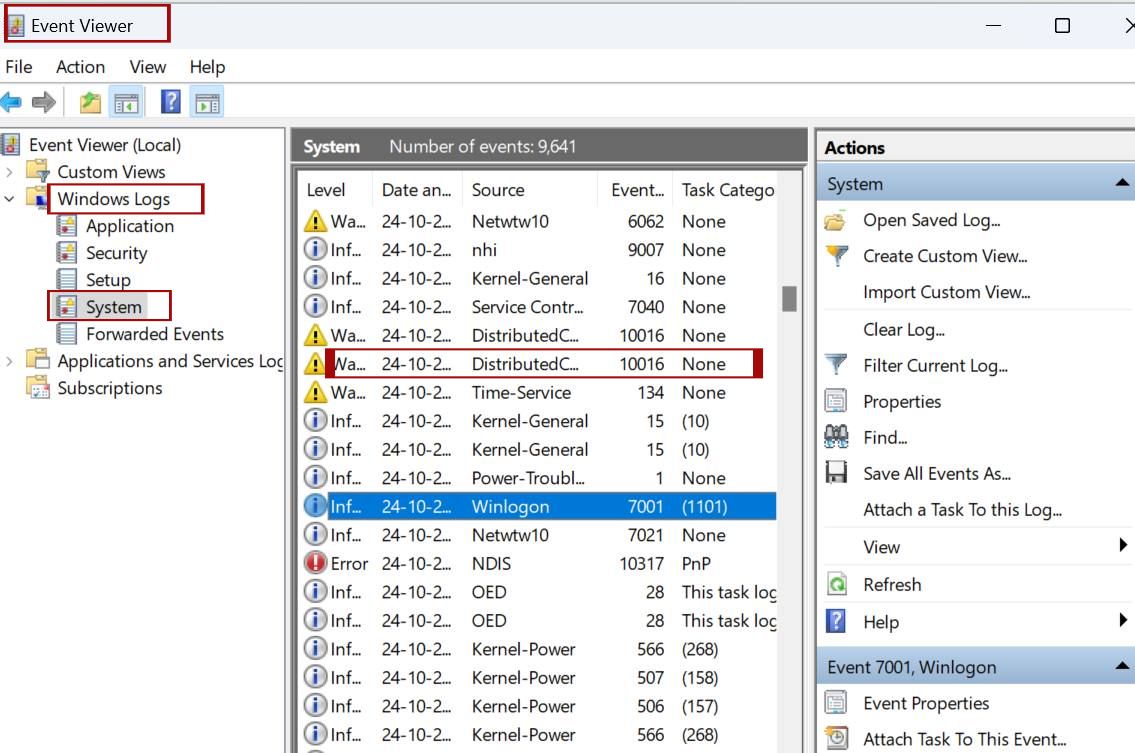
Event Viewer logs system events, helping diagnose errors.
Open: Search “Event Viewer,” navigate to Windows Logs > System.
Pros: Detailed diagnostics.
Cons: Technical. Ideal for advanced users.
Filter for errors post-2025 updates.
9. Monitor Resources with Resource Monitor
Steps:
- Open Resource Monitor from the Search Bar.
- Analyze tabs.
- Stop problematic processes.
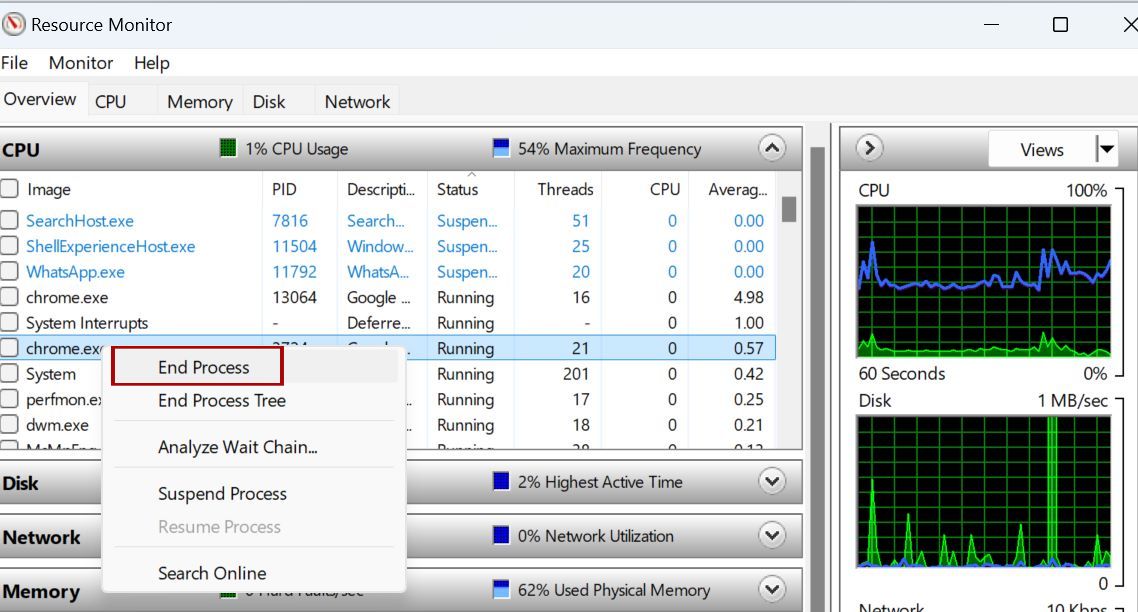
Resource Monitor shows real-time CPU, memory, and disk usage.
Access: Search “Resource Monitor.”
Pros: Identifies performance bottlenecks.
Cons: Overkill for simple issues. Use for slowdowns.
2025 enhancements include better graphs.
10. Run System File Checker (SFC)
Steps:
- Open CMD as admin.
- Enter the command “sfc /scannow.”
- Wait for completion.
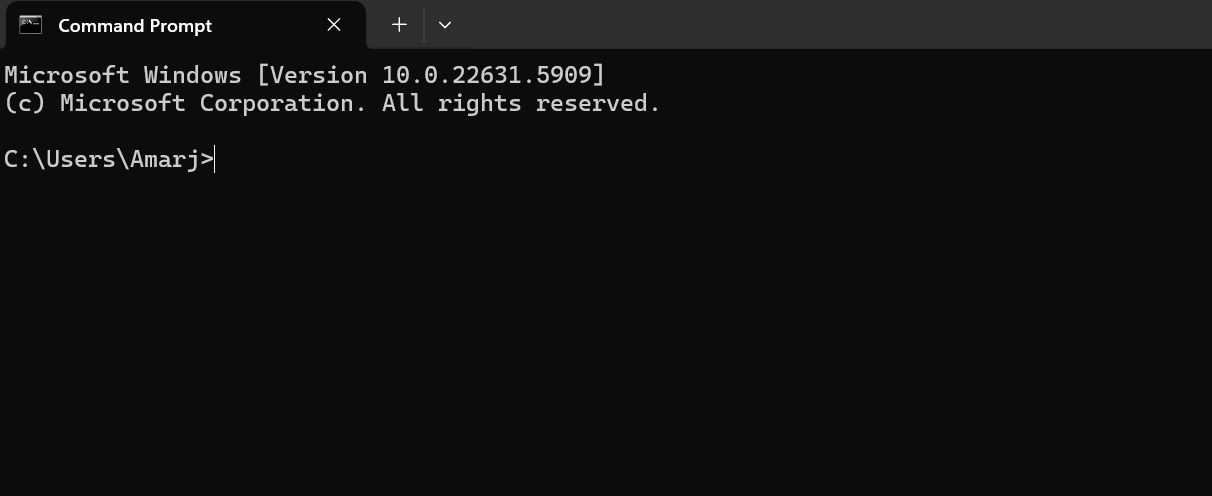
SFC scans and repairs corrupted system files.
Run: Admin Command Prompt, type “sfc /scannow.”
Pros: Fixes integrity issues.
Cons: Requires a restart sometimes. Essential after updates.
In 2025, faster scans.
11. Use DISM Tool for Image Repair
Steps:
- Admin CMD.
- Run the command “DISM /Online /Cleanup-Image /RestoreHealth.”
- Restart.
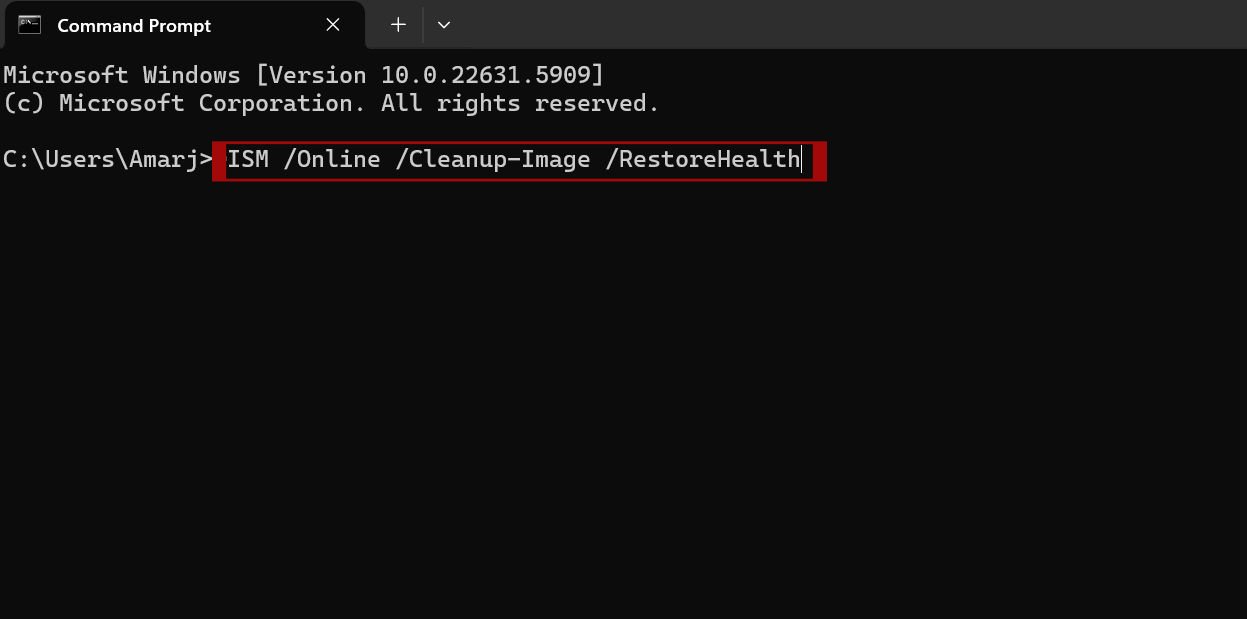
DISM repairs the Windows image when SFC fails.
Command: “DISM /Online /Cleanup-Image /RestoreHealth.”
Pros: Deep repairs.
Cons: Needs internet. Follow with SFC.
Updated for Windows 11 24H2.
12. Access Advanced Startup Options
Steps:
- Settings.
- System.
- Recovery.
- Advanced startup.
- Restart now.
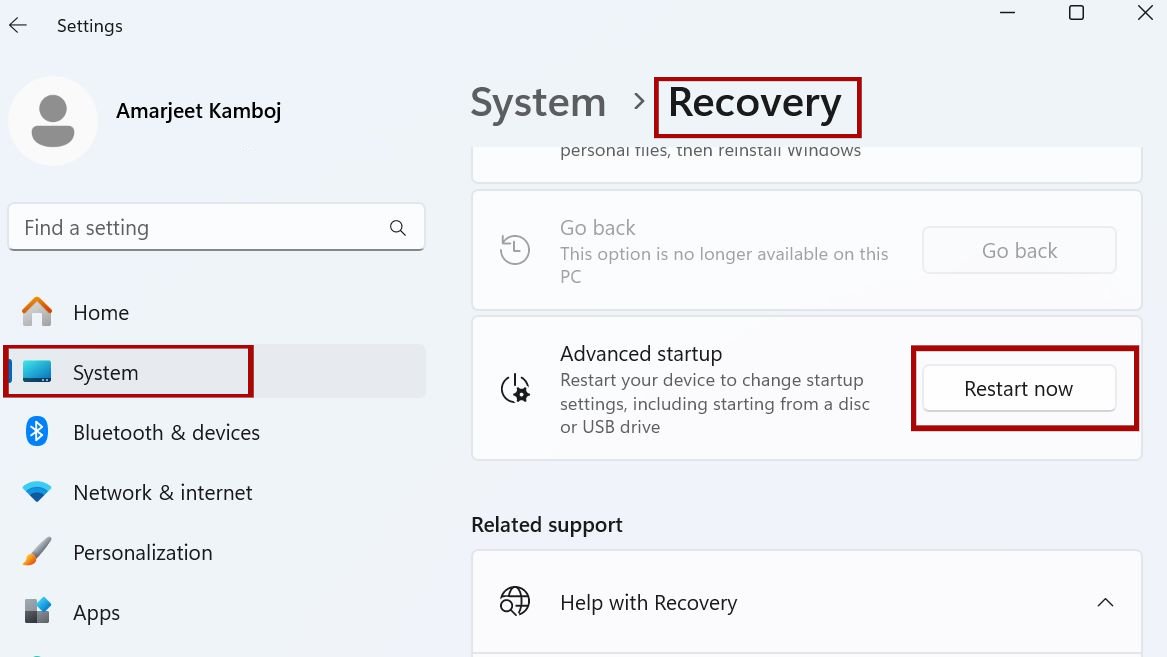
Advanced Startup provides recovery tools like Safe Mode.
Pros: Boot-level fixes.
Cons: Interrupts work. Use for boot issues.
2025 adds more options.
13. Explore the Tips App
Steps:
- Open the app.
- Browse categories.
- Apply learnings.
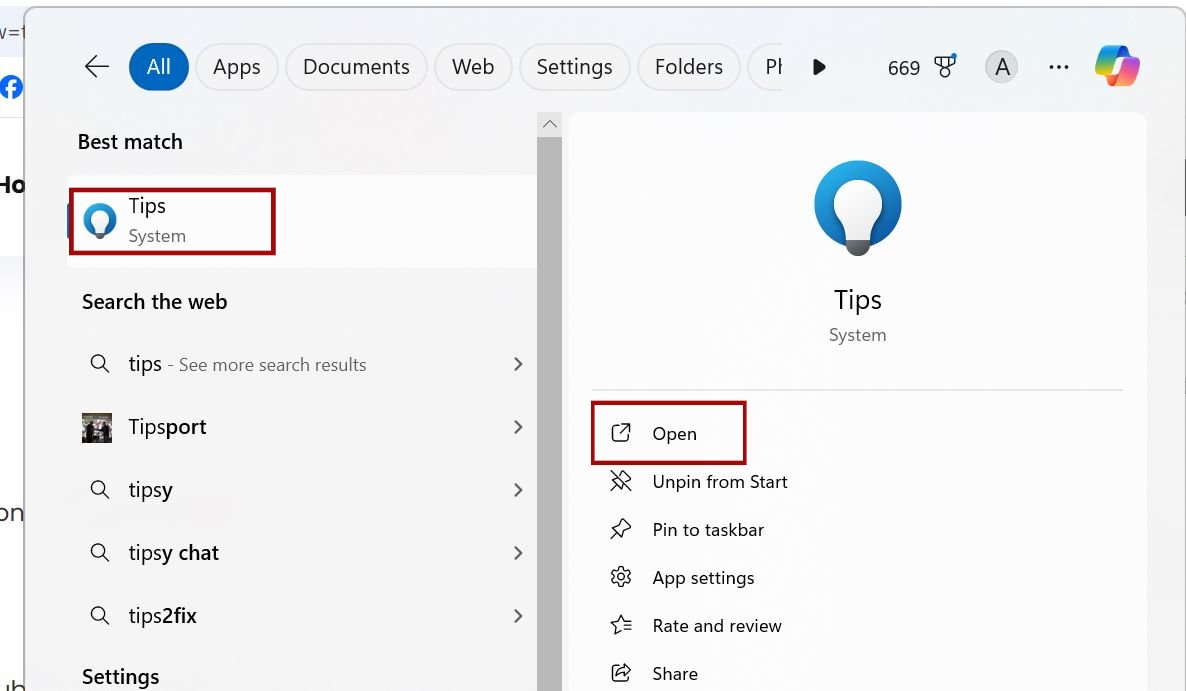
The Tips app offers tutorials and suggestions for Windows 11 features.
Open: Search “Tips.”
Pros: Educational, visual.
Cons: Not for troubleshooting. Great for new users.
Updated with AI tips in 2025.
14. Post in Microsoft Community Forums
Steps:
- Sign in.
- Post a question.
- Engage with replies.
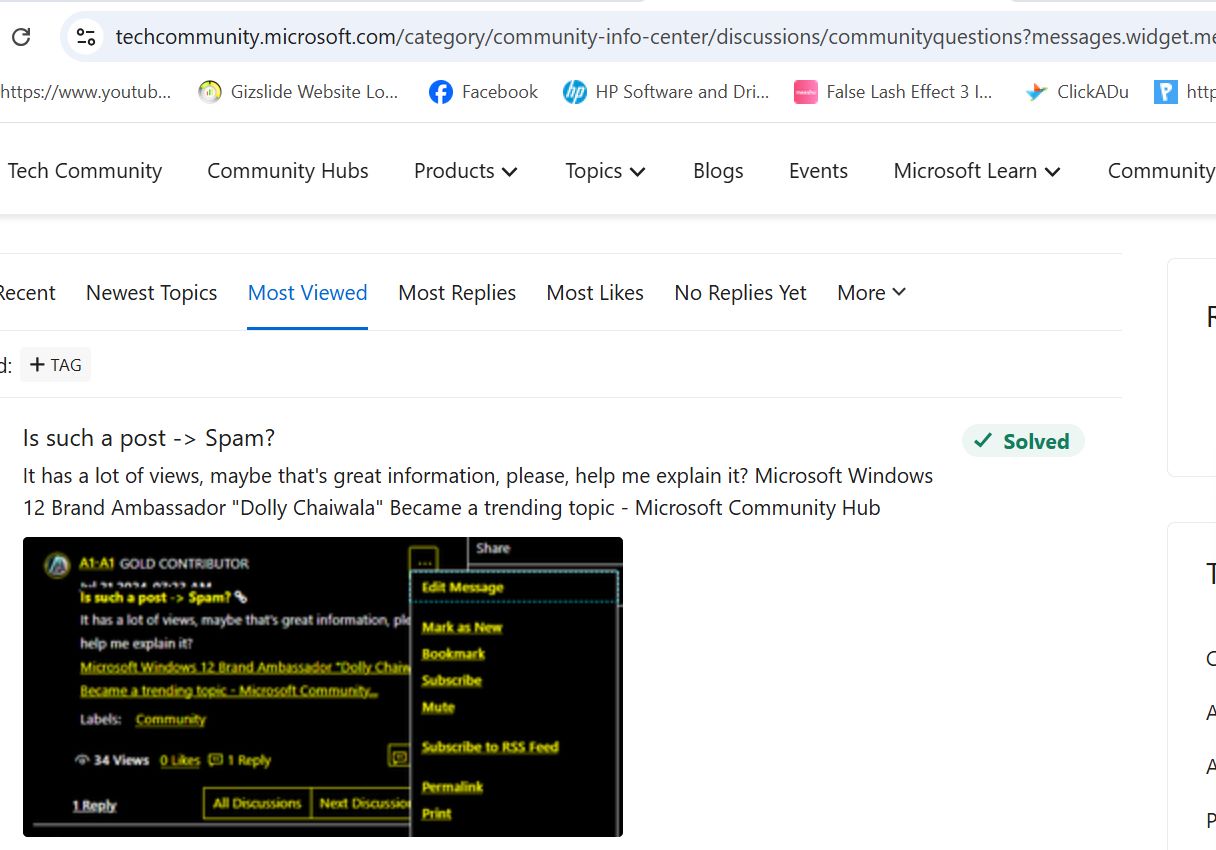
Microsoft Community forums allow asking peers and experts.
Visit: answers.microsoft.com, post in the Windows section.
Pros: Community wisdom, free.
Cons: Variable response time. Use for unique issues.
Active in 2025 with more categories.
15. Contact Microsoft Support Directly
Steps:
- Describe the issue.
- Choose a method.
- Follow up.
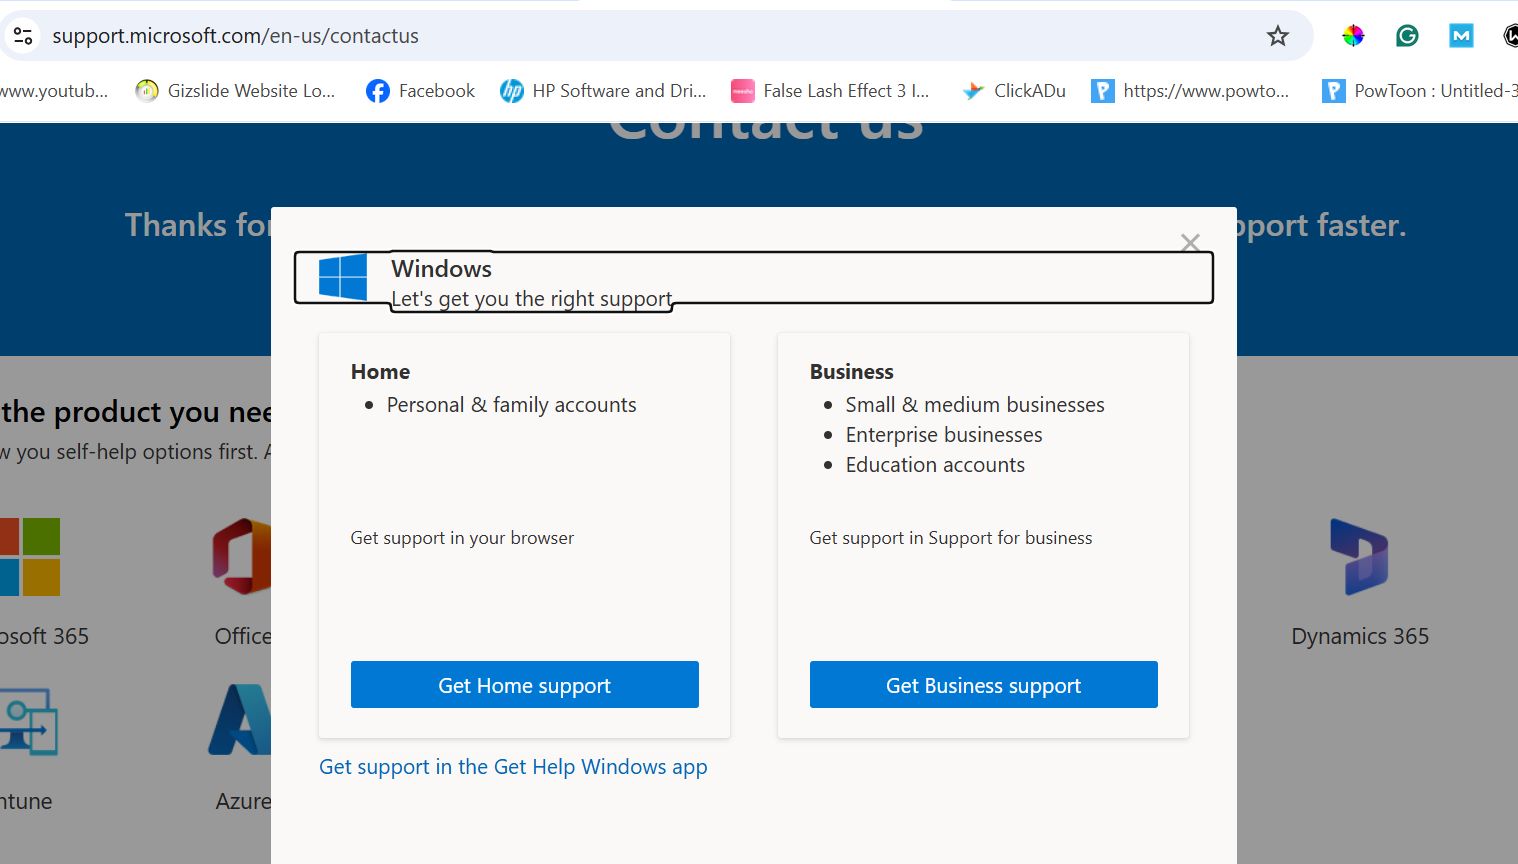
For persistent issues, contact Microsoft Support via chat, phone, or email.
Go to: support.microsoft.com > Contact us.
Pros: Official help, personalized.
Cons: Wait times. Best for warranty or severe problems.
2025 options include virtual appointments.
Conclusion
These 15 ways to get help in Windows 11 empower you to tackle any challenge. From quick searches to advanced tools, Windows 11 provides robust support. Remember, start with simple methods and escalate as needed. Stay updated with Windows releases for new features. If issues persist, combine methods for the best results. This guide ensures your Windows 11 experience is smooth and efficient.
![How to Get Help in Windows 11 [15 Ways]](https://geekswind.com/wp-content/uploads/thumbs_dir/How-to-Recover-Deleted-Files-in-Windows-11-re2jstp4fk9geev3n5fretinfh1vcl8rogcnune1x8.jpg)
![How to Get Help in Windows 11 [15 Ways]](https://geekswind.com/wp-content/uploads/thumbs_dir/Windows-11-Keyboard-Shortcuts-re3h96cp3oxg3xh52ql95wm7ygyfrcfolfva3topj0.jpg)