Deleting a file and realizing you need it back is one of those heart-sinking moments. Whether you accidentally hit Shift + Delete, emptied the Recycle Bin, or your system crashed, the good news is: you still have several solid methods in Windows File Recovery, built-in features, and third-party tools to try and get your files back. In this article, we’ll walk you through everything you need to know about how to recover deleted files in Windows 11 — why deletion doesn’t always mean gone forever, what precautions to take, how to use native tools, how to use file history/previous versions, how to use advanced command-line tools, and when and how to use recovery software. We’ll include plenty of screenshots (or “what you’ll see on your screen”) to make it clear.
Also Read: How to Take Screenshot on Windows 11
Why Deleted Files Are Often Recoverable
Before diving into how to recover files, it’s useful to understand why it’s possible at all.
-
When you delete a file in Windows (even via Shift + Delete), the file system typically just marks the space previously used by that file as “free” or “available for reuse”. It doesn’t immediately erase all the data.
-
As long as new data hasn’t overwritten that space, recovery tools can locate the remaining data and rebuild the file.
-
That means time matters: the sooner you act after deletion, the better your chances. Every write to the drive risks overwriting the deleted file’s data.
-
Some storage (e.g., SSD drives with TRIM enabled) may make recovery harder, because TRIM may actively clear deleted sectors sooner.
-
Built-in features like File History or Previous Versions, or backups, may make restoration easier without needing recovery tools.
Understanding this helps you act wisely: stop using the drive if possible, avoid installing software to the same drive, and pick the right method.
Preparatory Steps (Before You Start Recovery)
1. Stop using the drive
As soon as you realize you deleted something you shouldn’t have, avoid saving new files, installing software, or doing major changes to the same drive/partition. The more you write to that disk, the more likely your deleted file’s space gets overwritten.
2. Check where the file was stored
Was it on the system drive (C:) or an external drive/USB? Was it in a folder you track with File History or another backup? Knowing this helps pick the method.
3. Have a destination ready
When you recover a file, you’ll often want to save it somewhere else (a different partition or external drive) so you don’t risk overwriting other deleted data you might also want to recover.
4. Use built-in simpler methods first
Often, the easiest methods (Recycle Bin, Previous Versions) will do the job — so check those before diving into advanced tools.
Method 1: Restore from the Recycle Bin
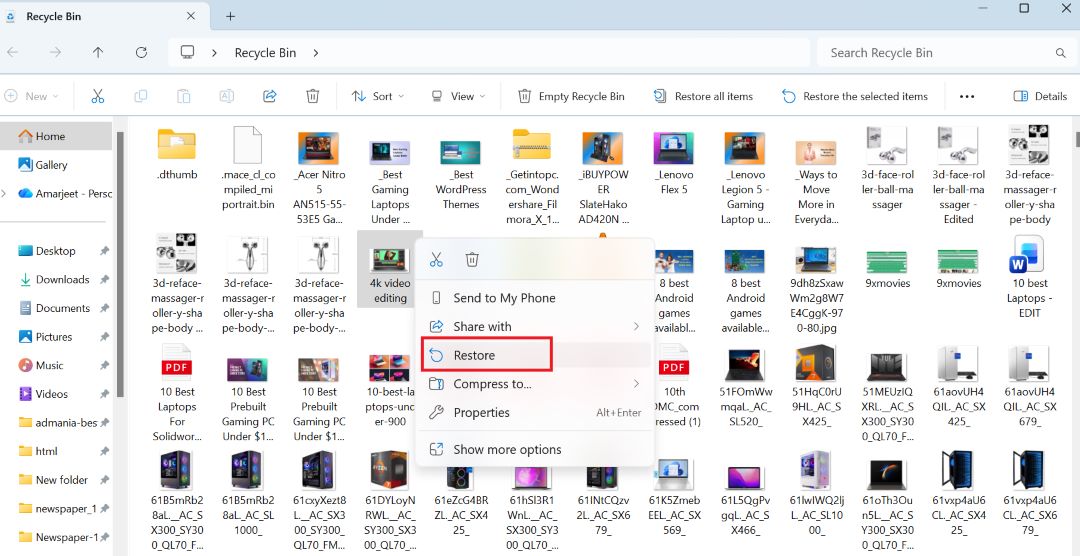
If you deleted a file the “normal” way (just hit Delete or right-click → Delete) and haven’t emptied the Recycle Bin, your file might still be there.
Steps
-
On your Windows 11 desktop, double-click the Recycle Bin icon.
-
Browse through the list to locate the file/folder you deleted.
-
Select the file(s) you want, right-click, and choose Restore. The file will be returned to its original location.
-
Alternatively, you can drag items out of the Recycle Bin window to another folder.
Things to note
-
If you emptied the Recycle Bin, this method won’t work (unless you have backups).
-
If the file was on an external/USB drive, ensure you open the correct Recycle Bin (since sometimes each drive keeps a hidden recycle folder).
-
If you right-clicked and selected Delete permanently (or used Shift + Delete) then the Recycle Bin won’t have the file — move on to other methods.
Method 2: Use the Undo Delete (Quick Trick)
If you just deleted the file and haven’t done much else, you may be able to use the “undo” trick.
Steps
-
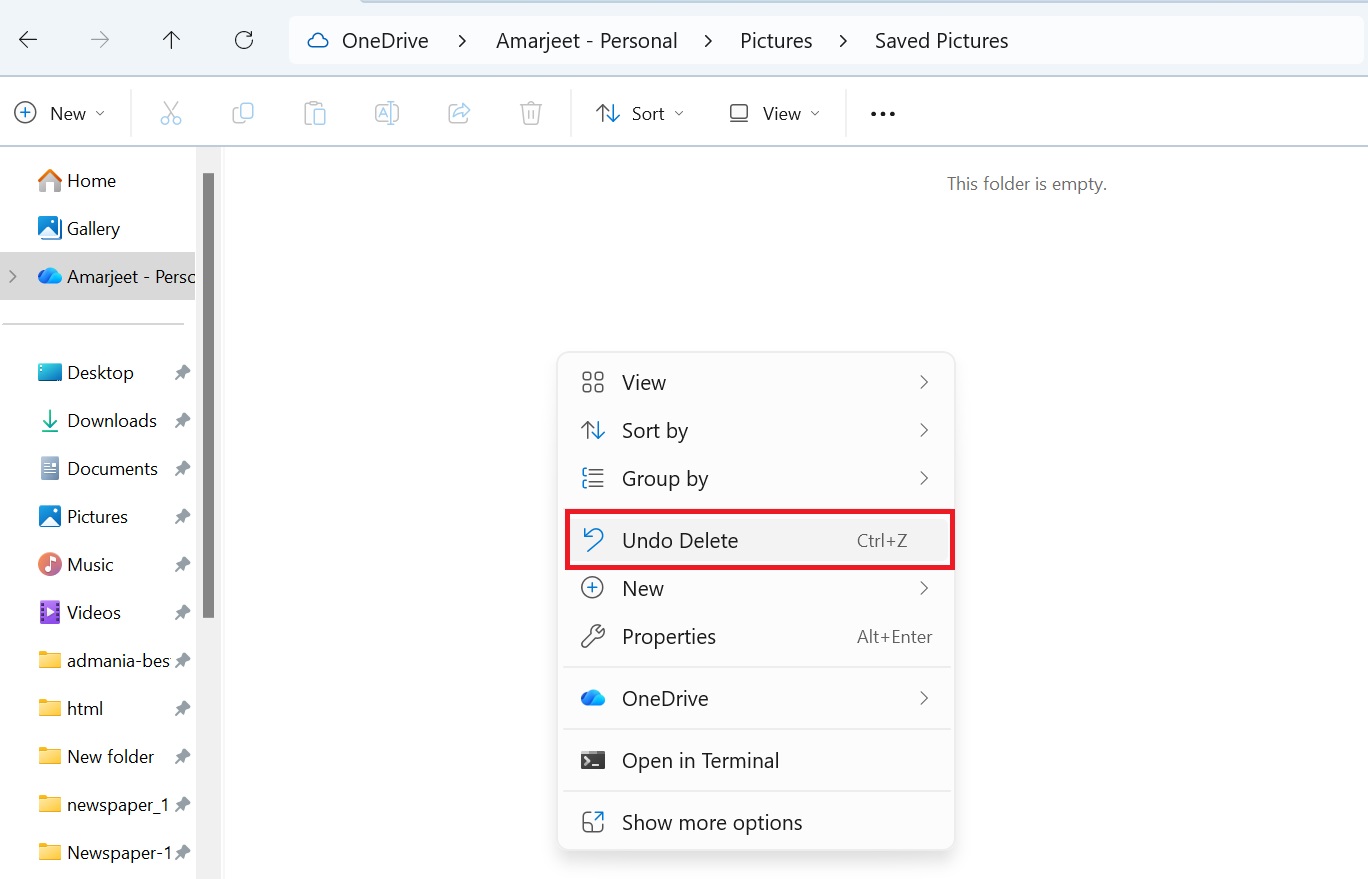
Return to the folder where you deleted the file.
-
Right-click in the space of the folder and select Undo Delete.
-
Or simply press Ctrl + Z while the folder is in focus. According to sources, this only works if very little else has happened since the deletion.
Things to note
-
This works only in the same folder session, and only if you haven’t closed the folder or done many other actions.
-
It doesn’t work if you emptied the Recycle Bin, moved the file, or logged off.
-
It’s a nice, quick fix and worth trying first because it’s so easy.
Method 3: Restore Previous Versions / File History
If you have backups enabled (using File History, or System Restore / Previous Versions), you may be able to restore a version of the folder or file before deletion.
Steps for Previous Versions
-
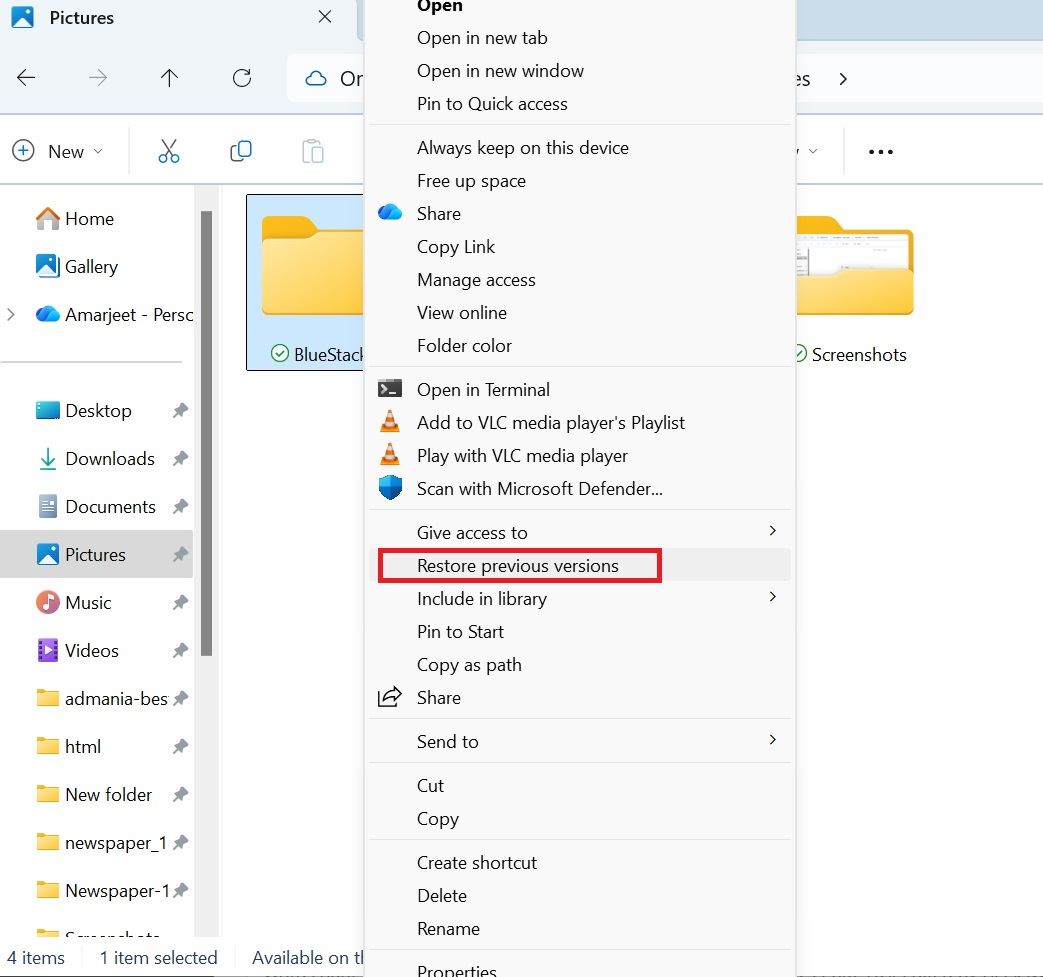
Open File Explorer and navigate to the folder that used to contain the deleted file.
-
Right-click the folder and select Restore previous versions.
-
In the “Previous Versions” tab, you’ll see available versions (if any). Choose one that has the file(s) and click Restore (or “Open” to view).
-
Alternatively, you could restore to a different location to avoid overwriting.
Steps for File History
-
Go to Settings → System → Storage → Advanced storage settings → Backup / File History (interface may vary).
-
If File History is turned on, you can browse backups of your files and folders.
-
Select the folder/file you want and choose Restore. Microsoft’s official support explains how to “restore files from a current backup” this way.
Things to note
-
This method depends on you having already enabled backups or File History before deletion. If you didn’t, there’s nothing to restore from.
-
You may restore older versions of files, so you might not get exactly what you lost if the backup is old.
-
This is often the safest method because it avoids messing with data recovery tools and possible data overwriting.
Method 4: Use the Microsoft Windows File Recovery Tool (Command-Line)
If the file is not in the Recycle Bin and you have no usable backup, you can use the official Windows File Recovery tool from Microsoft to attempt a deeper recovery. This tool can work on internal drives, external drives, USBs — but it’s a command-line utility.
Steps
-
Download and install the Windows File Recovery app from the Microsoft Store.
-
Open it (you’ll likely need Administrator privileges).
-
Use the
winfrcommand with proper arguments. Example:-
C:is the source drive (where the file was deleted) -
D:\Recoveryis the destination drive/folder (must be different) -
/nspecifies file/folder name or pattern
-
-
Choose the mode (e.g., Default, Segment, Signature) depending on your file system and situation.
-
Run the scan, then review the results and recover files to the destination you’ve selected.
Things to note
-
Because it’s command-line, this requires some comfort with typing commands.
-
It only works on local drives (not network shares).
-
For SSDs (especially with TRIM), results are less certain.
-
It’s more powerful than just “Undo” or Recycle Bin restore, but also more technical.
Method 5: Use Third-Party Data Recovery Software
When the above methods fail (the Recycle Bin is empty, there is no backup, and the file has been deeply deleted), you may need to use specialized third-party recovery software. Many users share a similar workflow: scan the disk, preview the results, select the files to recover, and save them elsewhere.
Popular Options
-
Recuva — Free and paid versions; widely used.
-
Disk Drill — Another strong option for Windows recovery.
-
EaseUS Data Recovery Wizard — User-friendly interface, good for less technical users.
General Workflow
-
Download and install the software — ideally not on the same drive you’re trying to recover from, to avoid overwriting recoverable data.
-
Launch the application, select the drive/partition where the deletion happened.
-
Choose between “quick scan” (faster) and “deep scan” (longer but more thorough).
-
Preview the results. Many tools will show you thumbnail previews or file names.
-
Select the files you want and choose a different destination drive/folder to save the recovered files.
-
Wait for completion and verify your recovered files.
Things to note / caution
-
No guarantee: Success depends heavily on how much new data has been written to the disk after deletion.
-
Some free versions limit how much data you can recover, or have restrictions (e.g., only preview files).
-
Always save recovered data to a different drive than the one you’re recovering from. Running the recovery software on the same drive can risk data loss.
-
If it’s extremely important data (business files, etc), and you’re not successful with these tools, consider a professional data-recovery service.
Common Scenarios & How to Handle Them
You deleted a file, and it’s still in the Recycle Bin
Solution: Use the Recycle Bin method (Method 1).
You deleted a file, emptied the Recycle Bin, but you have File History/backup enabled
Solution: Use Method 3 (Previous Versions / File History).
You deleted a file using Shift + Delete (so bypassing the Recycle Bin), and no backup
Solution: Use Method 4 (Windows File Recovery) or Method 5 (third-party software).
The file was on an external USB/SD card or secondary drive
Solution: Many of the methods above still apply. Make sure you target the correct drive. Third-party tools are particularly useful in this case. Also, avoid installing recovery software on that drive.
Scenario E: Your disk is corrupted, formatted, or inaccessible
Solution: This is more advanced — third-party tools with “deep scan” or signature-based recovery may be needed. The earlier you stop using the disk, the better your chances. Some recovery tools can recover after formatting.
Preventive Measures (so you don’t have to panic next time)
Preventing the loss of files is far easier than trying to recover them. Here’s what you should do:
-
Enable File History or another backup solution in Windows 11. This gives you a safety net.
-
Use cloud backup (e.g., OneDrive) for important folders.
-
Regularly back up external drives or important media.
-
Be cautious with Shift + Delete or emptying the Recycle Bin.
-
Consider using a disk-image solution for critical systems (so you can restore the entire state).
-
Avoid installing software or writing large amounts of data to a disk where you’ve just deleted something you want to recover.
Conclusion: How to Recover Deleted Files in Windows 11
Losing valuable data can be frustrating, but as we’ve seen, how to recover deleted files in Windows 11 is a straightforward process when approached with the right methods and tools. Windows 11 provides multiple recovery options that cater to different situations — from simple Recycle Bin restoration and File History recovery to more advanced solutions like the Windows File Recovery command-line tool or specialized third-party software such as Recuva, EaseUS Data Recovery, and Disk Drill. Each method serves a unique purpose depending on how and where your files were deleted.
The most important factor in successful file recovery is time. The sooner you act after deleting a file, the higher your chances of retrieving it intact. Avoid using or saving new data on the affected drive to prevent overwriting deleted sectors. Always recover files to a different storage location to maintain data integrity.
To safeguard your information in the future, make regular use of Windows Backup, File History, or OneDrive cloud synchronization. These proactive tools ensure that even if files are accidentally deleted, you can restore them effortlessly. Prevention is the best form of protection against data loss.
FAQ & Troubleshooting – How to Recover Deleted Files in Windows 11
Q: My file was permanently deleted (Shift + Delete), and I have no backup. Can I still recover it?
A: Possibly, yes — but it depends. If little or no new data has overwritten the space, recovery tools may find it. The sooner you act, the better.
Q: I use an SSD — is recovery harder?
A: Yes — if TRIM is enabled, the system may zero out deleted sectors more quickly, making recovery harder or impossible in some cases.
Q: The folder I deleted was on the desktop. Which method should I use?
A: The Desktop is just a folder under your user profile (usually C:\Users\YourName\Desktop). If you don’t find it in the Recycle Bin, use Previous Versions or third-party recovery pointing to the correct folder/drive. Many users on forums report issues when folder deletion happens on the Desktop.
Q: I used the computer a lot after the deletion. Will that ruin recovery chances?
A: It reduces the chances significantly. Each write to the disk may overwrite sectors previously holding the deleted file. That’s why the “stop using the drive” advice is important.