Keeping your Windows 11 computer clean and optimized is essential for maintaining performance and saving disk space. Over time, your PC accumulates temporary files, cache data, system logs, and leftover files from updates. These files can slow down your system and occupy valuable storage space.
Fortunately, Windows 11 includes a built-in utility called Disk Cleanup that helps you safely remove unnecessary files, free up space, and keep your computer running efficiently.
In this professional guide, you’ll learn everything you need to know about how to use Disk Cleanup in Windows 11—including what it does, step-by-step usage, advanced options, automation, and frequently asked questions.
Also Read: Fix Windows Modules Installer Worker High CPU
What Is Disk Cleanup in Windows 11?
Disk Cleanup is a built-in maintenance tool from Microsoft that helps users delete temporary files and other non-essential data from their computers. It scans selected drives and identifies files that can be safely deleted without affecting your system’s functionality.
This tool has been part of Windows for many years and continues to serve as an efficient, reliable way to manage disk space in Windows 11.
Main Functions of Disk Cleanup
-
Remove temporary files generated by apps and the system.
-
Empty the Recycle Bin safely.
-
Delete leftover files from Windows Updates.
-
Clean old installation logs, cached data, and error reports.
-
Free up gigabytes of storage space quickly.
By regularly using Disk Cleanup, you can keep your computer organized, improve performance, and ensure smooth system operation.
Why Disk Cleanup Still Matters in Windows 11
Although Windows 11 includes Storage Sense—an automated cleanup feature—Disk Cleanup remains useful for several reasons:
-
Manual control: You can choose exactly what to delete.
-
Access to system-level files: Disk Cleanup can remove Windows Update leftovers, old system installations, and more.
-
Offline operation: It works entirely without an internet connection.
-
No third-party software required: It’s built into Windows and 100% safe.
Disk Cleanup is especially helpful after major Windows updates, where temporary installation files can take up several gigabytes.
How to Open Disk Cleanup in Windows 11
There are multiple methods to launch Disk Cleanup, depending on your preference.
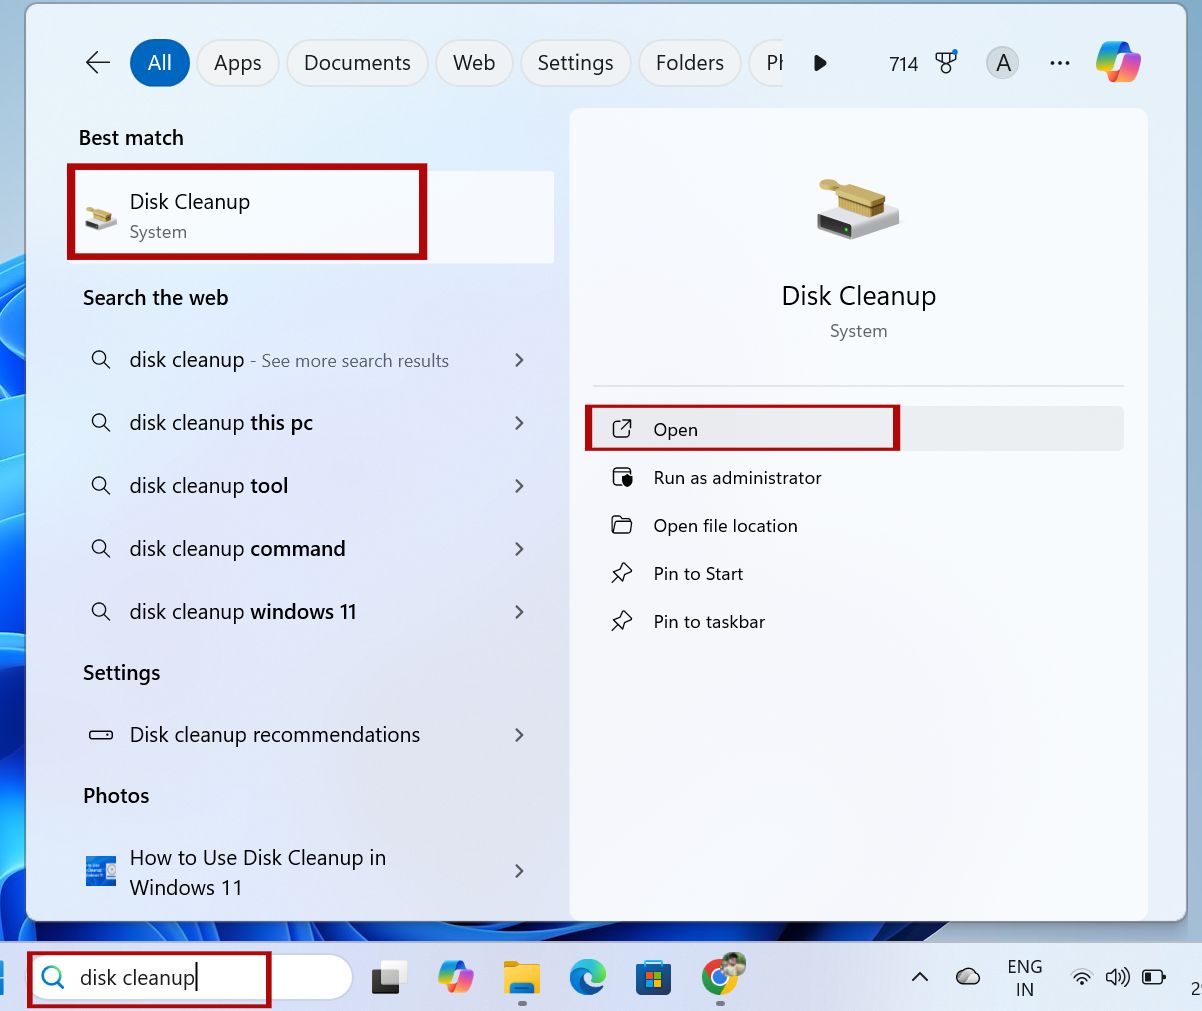
Method 1: Use the Start Menu
-
Click the Start button or press the Windows key.
-
Type Disk Cleanup in the search bar.
-
Click the result labeled Disk Cleanup.
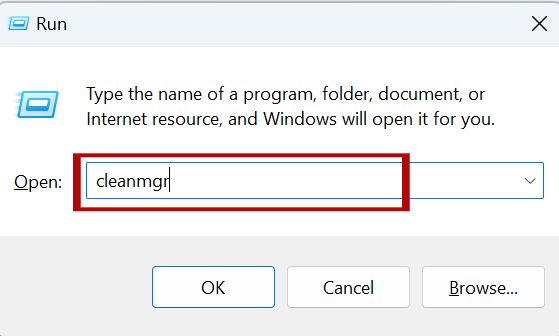
Method 2: Use the Run Command
-
Press Windows + R to open the Run dialog box.
-
Type
cleanmgrand press Enter. -
Disk Cleanup will launch immediately.
Method 3: From File Explorer
-
Open File Explorer.
-
Right-click the drive you want to clean (for example, C:).
-
Select Properties.
-
Click the Disk Cleanup button under the General tab.
Method 4: Command Prompt or PowerShell
Open Command Prompt or Windows PowerShell, then type:
Press Enter to open Disk Cleanup.
Step-by-Step Guide: How to Use Disk Cleanup in Windows 11
Once Disk Cleanup opens, follow these steps carefully:
Step 1: Select a Drive
You’ll be prompted to choose a drive. Select Local Disk (C:), as it usually contains your system files, and click OK.
Step 2: Scan for Files
Disk Cleanup will analyze the selected drive. The scan may take a few minutes, depending on your system and file volume.
Step 3: Review the File Categories
After scanning, you’ll see a list of file types and how much space each category occupies. Common ones include:
-
Temporary Internet Files
-
Recycle Bin
-
Temporary Files
-
Delivery Optimization Files
-
Thumbnails
Step 4: Select What to Delete
Check the boxes next to the file types you want to remove.
Hover over each item for a description of what it contains. Most temporary files are safe to delete.
Step 5: Confirm Cleanup
Click OK, then confirm by clicking Delete Files.
Disk Cleanup will permanently delete those files.
Advanced Mode: Clean Up System Files
If you want to remove deeper system files, you can use the Clean up system files option.
How to Access It
-
In the Disk Cleanup window, click Clean up system files.
-
Select your drive again (usually C:).
-
Disk Cleanup will rescan and show additional categories.
Additional Categories You’ll See
-
Windows Update Cleanup – Removes old or unnecessary update files.
-
Previous Windows Installations (Windows.old) – Deletes leftover files from prior installations.
-
Device Driver Packages – Removes outdated driver backups.
-
System Error Memory Dump Files – Deletes logs from system crashes.
-
Windows Upgrade Log Files – Removes upgrade logs no longer needed.
Important Note
If your computer has recently been upgraded to a new Windows version, deleting Previous Windows Installations will prevent rollback to the old version. Make sure your current version is working well before proceeding.
After reviewing selections, click OK, then Delete Files.
Automate Disk Cleanup with Storage Sense
While Disk Cleanup is manual, Windows 11 also includes Storage Sense, which automatically clears temporary files and Recycle Bin content.
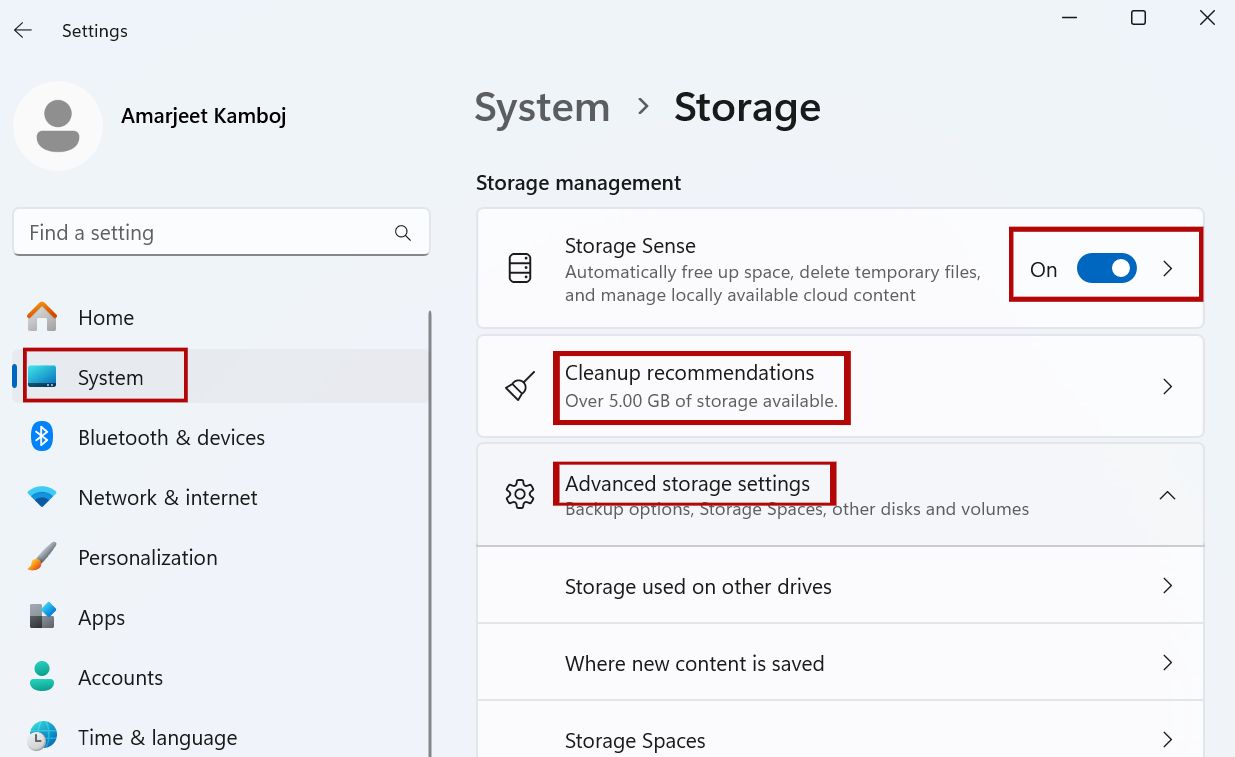
How to Enable Storage Sense
-
Press Windows + I to open Settings.
-
Go to System → Storage.
-
Turn on Storage Sense.
-
Click Storage Sense settings to configure it.
Storage Sense Options
You can choose:
-
How often does Storage Sense run (daily, weekly, monthly)?
-
When to delete temporary files.
-
How long to keep Recycle Bin or Downloads items?
Storage Sense is ideal for continuous, low-maintenance storage management. Use Disk Cleanup occasionally for deep cleaning.
Use Disk Cleanup with Command-Line Automation
Advanced users or IT professionals can automate Disk Cleanup using command-line parameters.
Example Commands
Cleans the C: drive.
Opens the settings dialog where you can select which file types to delete.
Runs the cleanup automatically based on the saved settings.
You can schedule this task with Windows Task Scheduler to perform automated maintenance weekly or monthly.
Disk Cleanup vs. Storage Sense: Key Differences
| Feature | Disk Cleanup | Storage Sense |
|---|---|---|
| Operation | Manual | Automatic |
| Introduced In | Windows 98 | Windows 10 |
| Access | Classic utility | Windows Settings |
| File Scope | System-level and temporary files | Temporary and user data |
| Customization | High | Moderate |
| Offline Use | Yes | No (uses Settings) |
Which Should You Use?
For routine users, Storage Sense handles everyday maintenance.
For advanced users or administrators, Disk Cleanup offers more control and system-level options.
Common Disk Cleanup Issues and Fixes
Even though Disk Cleanup is reliable, you might encounter occasional issues. Here’s how to fix them safely.
Issue 1: Disk Cleanup Doesn’t Open
-
Cause: Corrupted system files.
-
Fix: Run the System File Checker tool:
Issue 2: Files Not Deleting
-
Cause: Files are in use by other processes.
-
Fix: Restart your PC and rerun Disk Cleanup in Safe Mode.
Issue 3: Cleanup Freezes During Windows Update Cleanup
-
Cause: Damaged update cache.
-
Fix: Manually reset Windows Update components:
Issue 4: Disk Cleanup Doesn’t Free Space
-
Cause: Protected files or System Restore data.
-
Fix: Disable System Protection temporarily, run Disk Cleanup, then re-enable it.
Best Practices for Using Disk Cleanup in Windows 11
Follow these professional maintenance tips to maximize your results:
-
Run Disk Cleanup monthly – Keeps storage optimized.
-
Run it after major Windows updates – Removes leftover update files.
-
Combine with Storage Sense – Use both tools for complete coverage.
-
Check file categories carefully – Avoid deleting important logs or old installations if you need them.
-
Create a restore point before cleaning system files.
Extra Ways to Free Up Space in Windows 11
Beyond Disk Cleanup, there are additional safe ways to reclaim disk space.
-
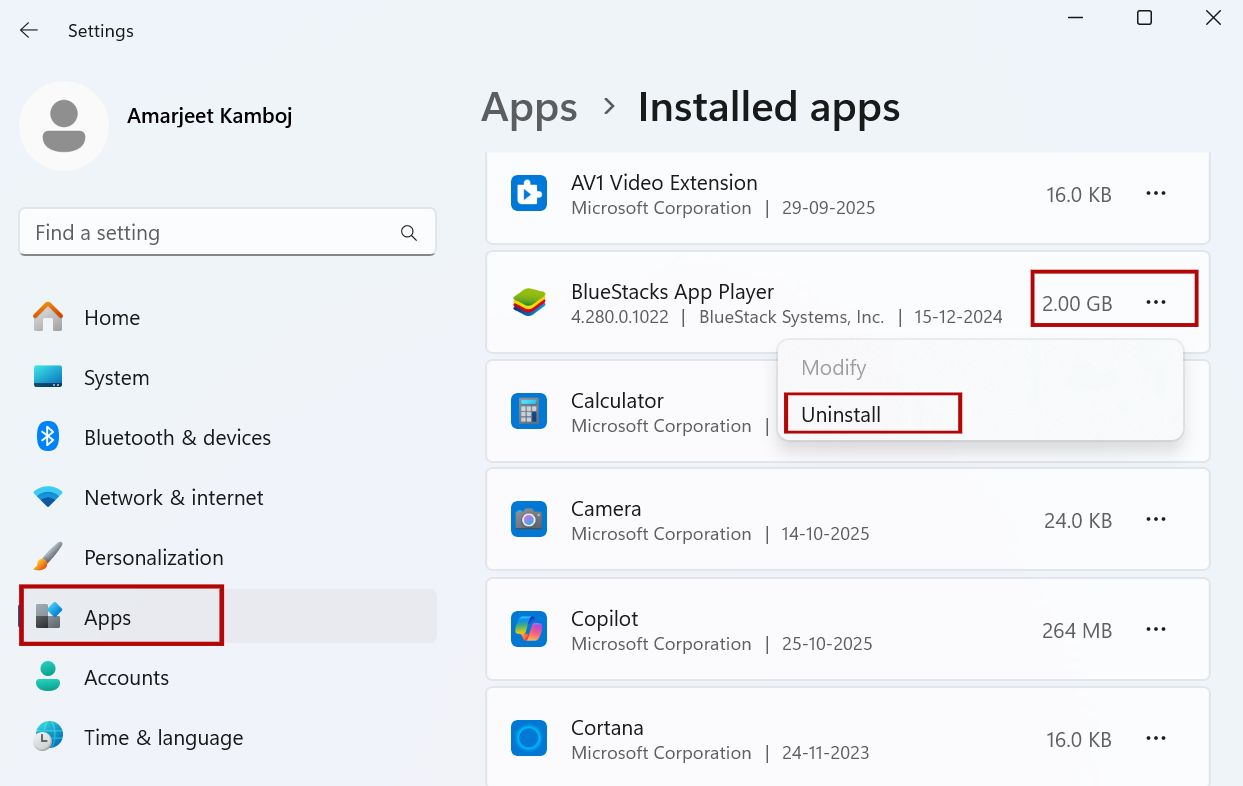
Uninstall Unused Programs: Go to Settings → Apps → Installed apps.
-
Empty Downloads Folder: Check for large files you no longer need.
-
Use Cloud Storage: Move personal files to OneDrive or another cloud service.
-
Disable Hibernation (Advanced):
This can free several gigabytes.
-
Delete Old Restore Points: Manage from Control Panel → System Protection → Configure.
These methods complement Disk Cleanup and keep your computer lightweight and responsive.
Frequently Asked Questions (FAQs)
1. Is Disk Cleanup safe to use in Windows 11?
Yes. Disk Cleanup is a built-in Microsoft tool designed to safely remove unnecessary files such as temporary files, cached data, and system logs. It does not delete personal documents, photos, or important system files unless you specifically choose them.
How often should I use Disk Cleanup on my PC?
It’s best to run Disk Cleanup once a month or whenever you notice that your computer is running low on storage. Regular cleanups help maintain performance and prevent your system from slowing down due to excess temporary data.
What happens if I delete “Previous Windows Installations”?
Deleting “Previous Windows Installations” removes Windows.old folder, which contains files from your previous version of Windows. This action frees up several gigabytes of space but also removes the option to roll back to the earlier version. Only delete it once you’re sure your current system is stable.
What’s the difference between Disk Cleanup and Storage Sense?
Disk Cleanup is a manual tool that allows detailed control over what files you delete, including system-level items.
Storage Sense, on the other hand, is an automated feature in Windows 11 that periodically removes temporary files, Recycle Bin content, and old downloads without manual input. Using both together provides the best storage optimization.
Can I automate Disk Cleanup to run on a schedule?
Yes. You can automate Disk Cleanup using the command:
and schedule it through Windows Task Scheduler. This setup ensures your PC is cleaned regularly without manual effort.
Conclusion
Disk Cleanup in Windows 11 remains one of the most dependable and efficient ways to maintain your computer. Although Microsoft is moving toward newer features like Storage Sense, Disk Cleanup offers detailed control, reliability, and compatibility for all types of users.
Running Disk Cleanup regularly keeps your PC organized, prevents low-storage errors, and helps your system operate smoothly—without relying on third-party software.
For best results:
-
Use Disk Cleanup monthly for deep cleaning.
-
Enable Storage Sense for ongoing automatic cleanup.
-
Regularly monitor your drive space in Settings → Storage.
By following this guide, you’ll ensure your Windows 11 system remains clean, fast, and efficient for years to come.